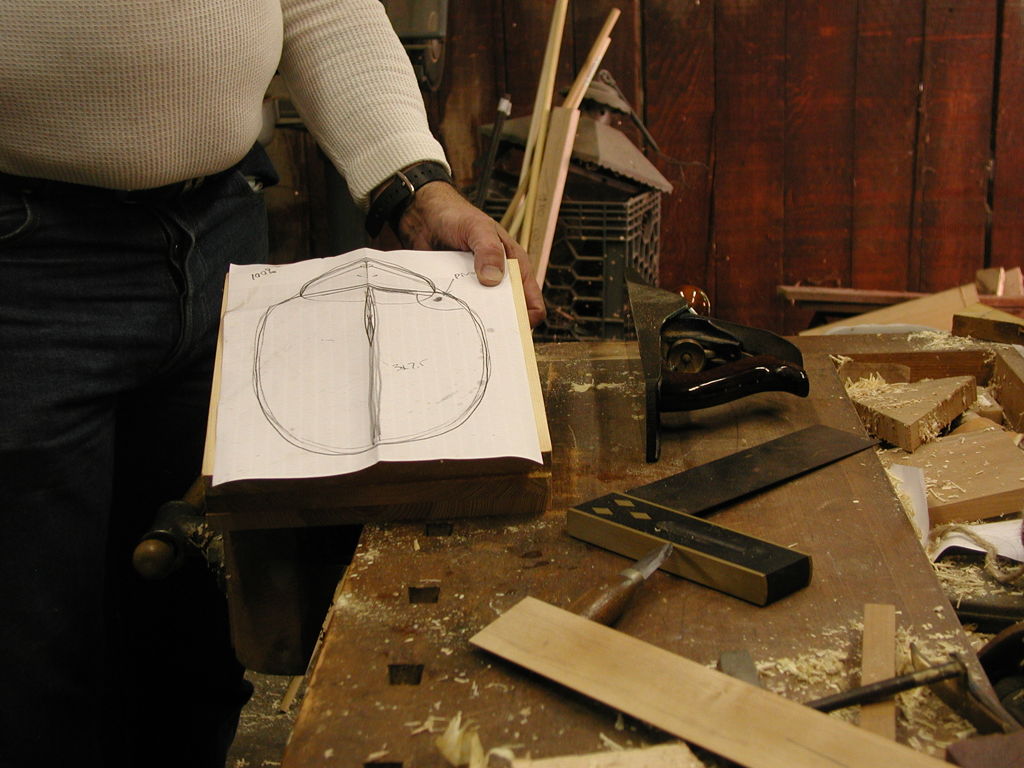
It’s taken me a long time to get anywhere with this third box. I started designing it in November 2003, and now in early 2007, it’s finally done. I decided fairly early on that I wanted to make it in the shape of a ladybeetle, with two drawers that would swing out from under the elytra (the nonfunctional wings that make up the hard shell in shape of a dome).

Most of the structure is of birch, especially the drawers, whose curved sides I made by laminating two thin layers that I (very !) crudely steamed to form. I wanted to make the dome out of Osage Orange (Maclura pomifera), a North American tree whose wood is naturally rather yellow, and even bought some, but I made so many errors in constructing the dome that I made of this wood that I gave up and decided to do this part of the construction in Mahogany. Reddish brown will just have to stand in for orange.
When you steam wood, you want to do it under pressure, but we don’t even have a pressure cooker. I just set the pieces to form on a little pedestal inside a big pot of boiling water. The result was just barely flexible enough to bend. By gluing together two similarly-curved laminae, I got enough resistance to unbending to satisfy myself.
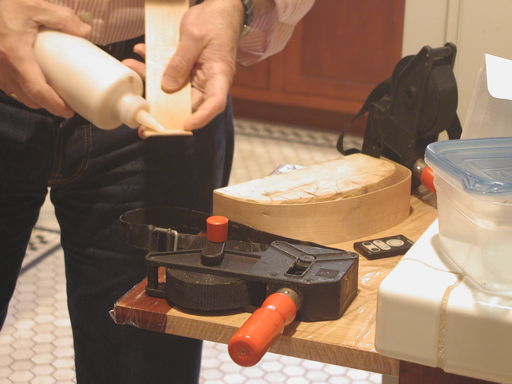
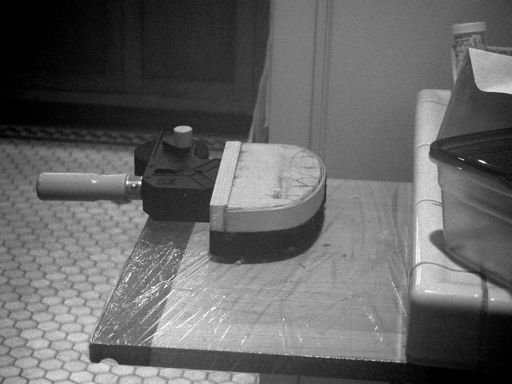
In the pictures to the right from 26 Feb ’04, I’ve bent the strips for one of the drawers, and am gluing them together. In the upper picture, beneath my left hand you can see the strap-clamp that I would be using, and around the curved form behind it, you see the inner lamina. (Big image, small.) In the lower picture, my little point-and-shoot Olympus must have taken on some condensation, and to get any use out of the image, I had to convert to black and white. What’s going on is the actual clamping, after the gluing-up. (Big image, small.) The glossiness is plastic wrap that I used for covering the kitchen cutting board, so that no glue got on.

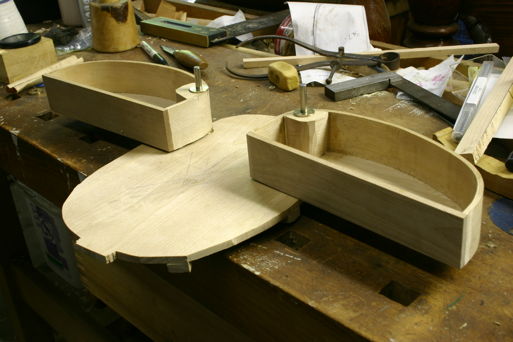
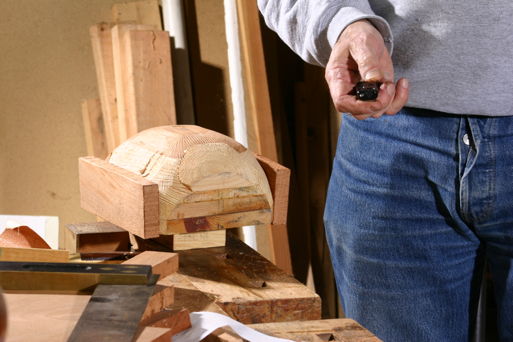
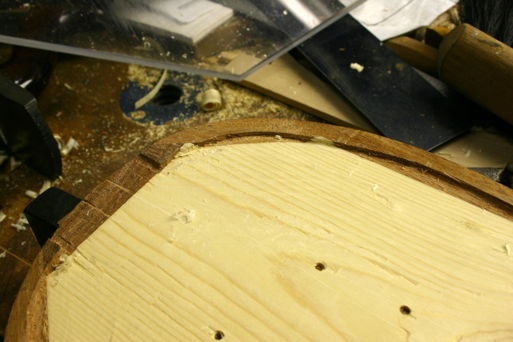
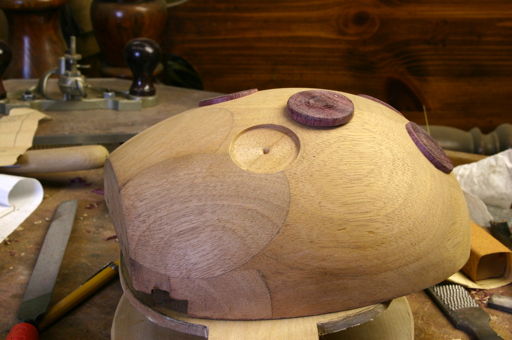
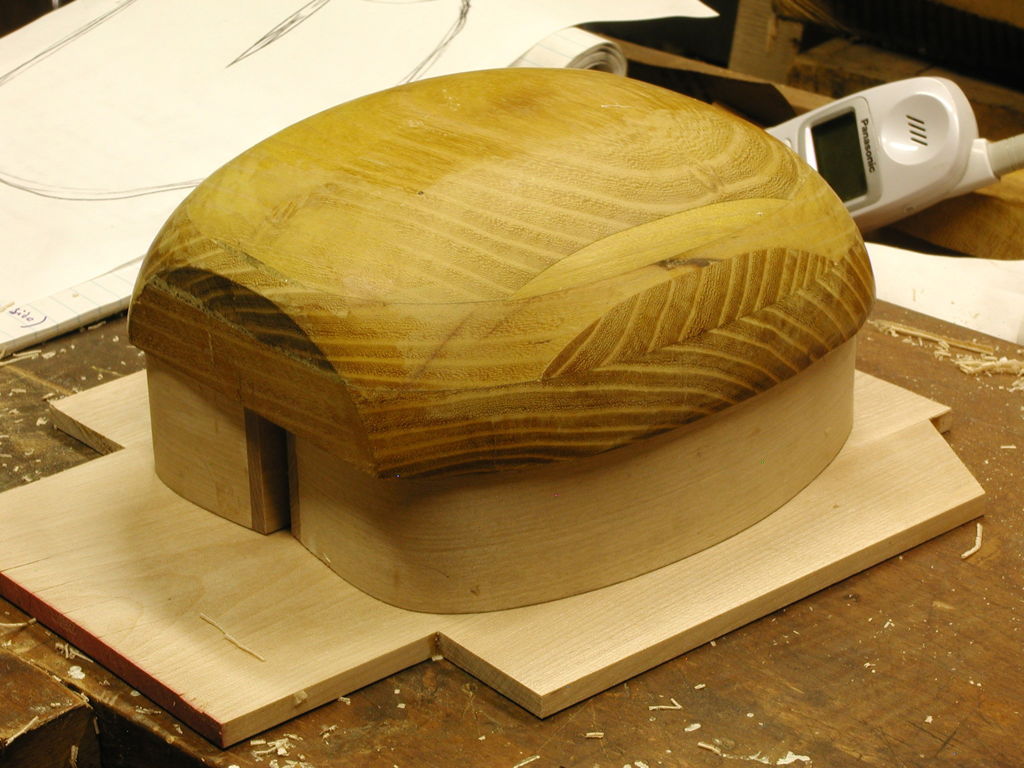
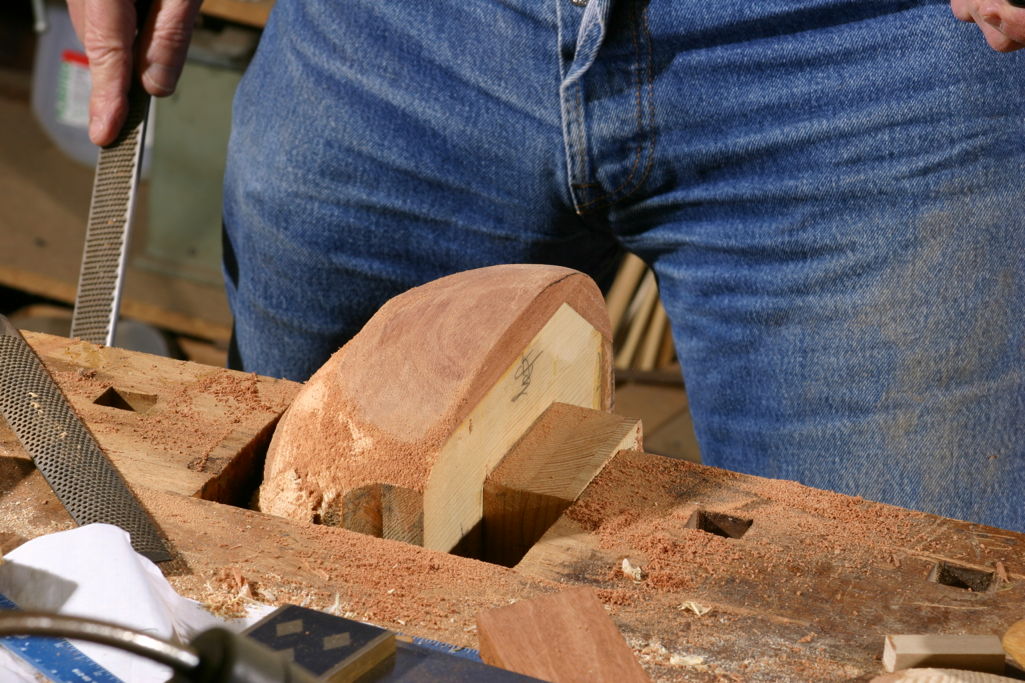
For the dome I laid out $35 for a short thick plank of Osage-Orange, and what possessed me to cut it up and glue it together in the way that I did, I do not know. It was a serious mistake, as I realized once I had rasped it into the right shape. There it is, to the right, with the grain going every which way. It’s sitting on the two drawers, so that I can lay out the floor, which the drawers will eventually pivot from. (Big image, small.) (21 Jun, ’04)
(As I recall now in 2020, the fiasco of Doing the Wrong Thing with that expensive piece of hardwood put me into a woodworking funk, since for quite some time I didn’t know how I was going to make a dome after all. I guess it was six months before I started again to work on this box.)

The bearings for the pivots I had to make for myself. Fortunately, I had the very old but perfectly serviceable metal-working lathe that I had inherited from my cousin Howard, and a stock of brass that was ideally suited to the task. The turned brass sits there looking pretty, to the left. (29 Dec, ’04)
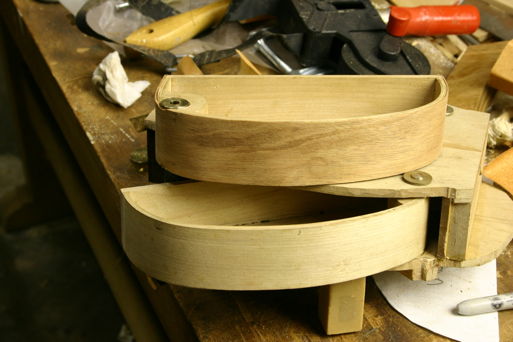
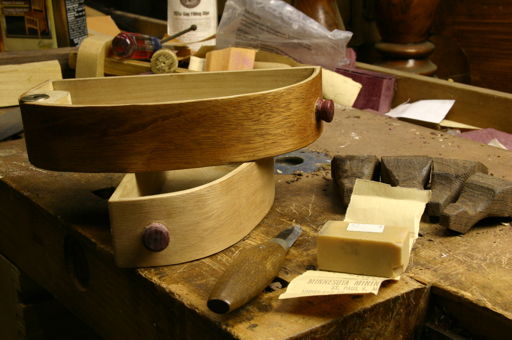
To the right, the drawers and their fittings are assembled, pivoting on the floor. A roof needs to be placed above as well, with similar fittings (big image, small). (4 Jan, ’05)

Here, to the right, the bushings are pulled out of their seats, and one drawer is inverted so you can see the construction (big image, small). The transversal vertical wall will be part of the support of the roof, and you see drawn on the floor a pair of lines indicating the position of a longitudinal wall. (9 Mar, ’05)

To the left, now, the longitudinal wall has been glued in, the tailpiece likewise. This latter will brace the wall and support the ceiling above the drawers, as well as hide the details of what’s happening inside. At this stage, the drawers can’t close, since they hit the structural members bracing the longitudinal wall.
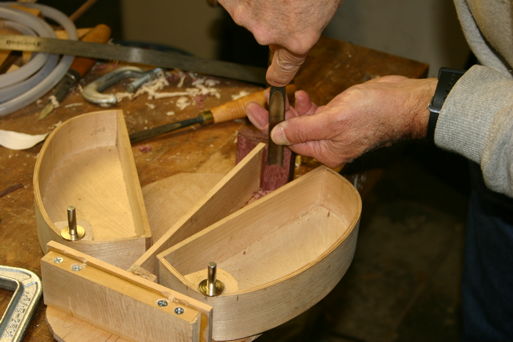
On the right again, I’m paring away the tailpiece so it won’t be hit by the drawers as they close. (This and the previous from 9 Apr, ’05.)
I guess it was some time in the Fall of 2005 that I finally bit the
bullet and started working on a new dome, to be of Mahogany. I made
a pine blank of exactly the right size and shape as the final dome
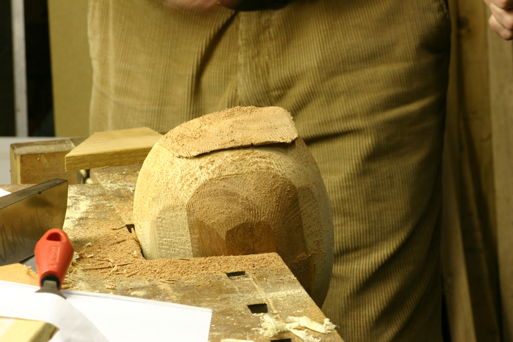
was to be. Then I would saw away at angles, plane that surface, and
glue there sections of mahogany plank. Next re-rasp
the mahogany
down to the same shape as the pine had been. Repeat many times,
as you see in the images below.

|
|
|
|
|
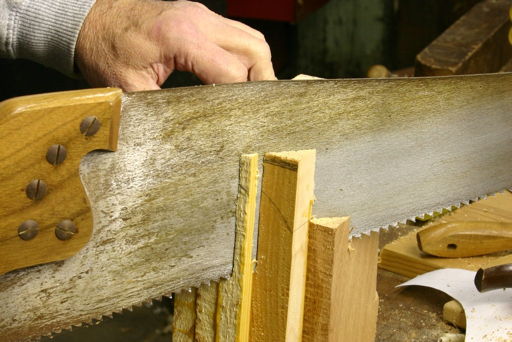
Pine planks glued together (big image, small). |
Sawing to crude form (big image, small). |
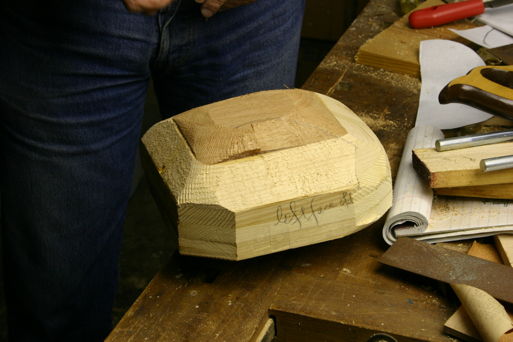
Preliminary polyhedral stage (big image, small). |
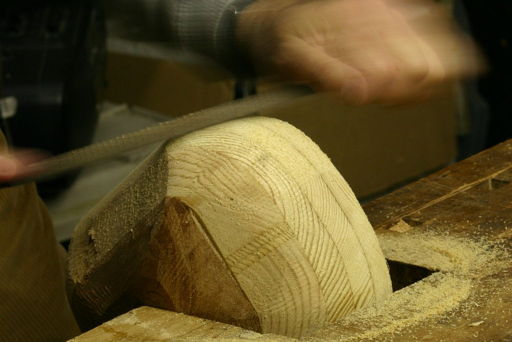
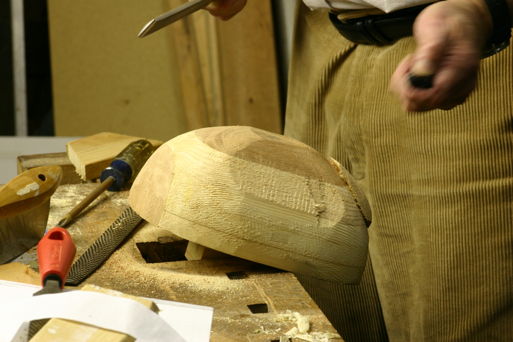
Rasping to get roundness (big image, small). |
|

|
|
|
|
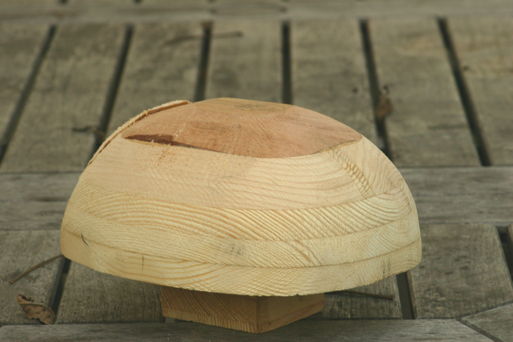
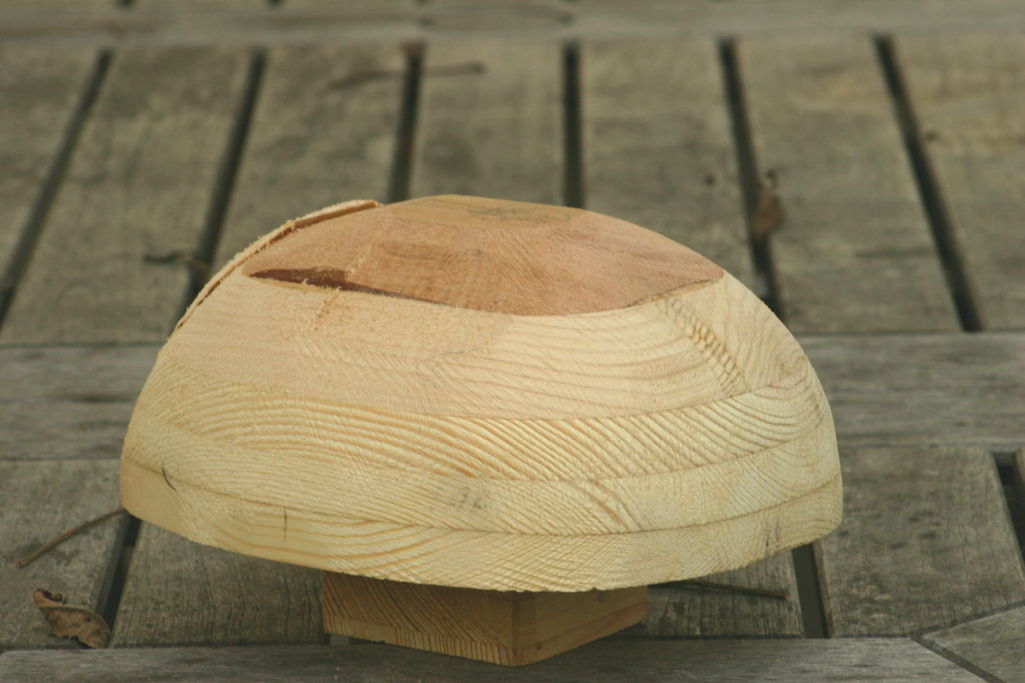
Outdoor lighting: blank is finished (big image, small). |
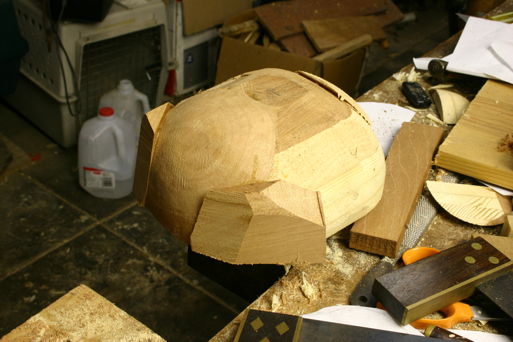
Next stage: cut flats onto the blank, plane them accu- rately, glue sections of ma- hogany onto the flat, then rasp to the right shape (big image, small). |
Preliminary polyhedral stage (big image, small). |
Rasping to get roundness (big image, small). |
|
|
|

|
|
And so, do the same thing over again and again (big image, small) |
Big image, small. |
Planks are now glued to both sides (big image, small). |
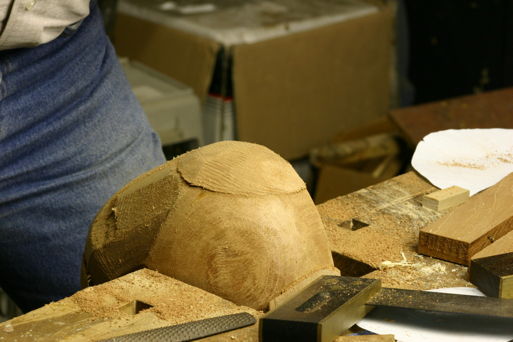
This side nearing completion (big image, small). |
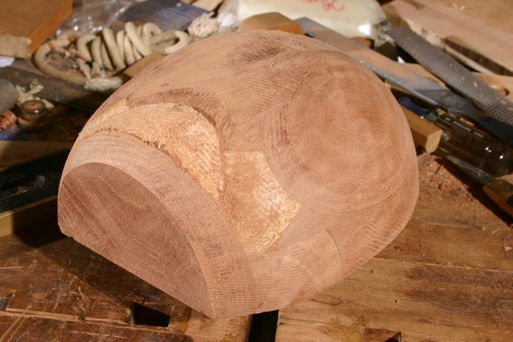
On the right, the outer surface of the dome is almost done, but the interior will need to be hollowed out. (7 Feb, ’06)
Just why I couldn’t get down to work on this all Spring of 2006 or for most of the Summer, I don’t know. Before the fallow period started, though, I decided that I wanted to put a Mahogany veneer on the sides of the drawers so that their visible surface would match the dome more precisely. I investigated the possibility of buying veneers, but it seemed impractical to buy as small a quantity as I’d be using. So I made some veneer, .020″ thick, by the simple expedient of planing down some slices of stock that I had glued with artist’s rubber cement to a rigid backing.
On 13 Aug, 2006, I finally got around to making the attempt to put one of the sheets of veneer onto a drawer. I steamed the sheet and got it in roughly the right shape, glued it on, and after a decent wait, sanded the excess glue away. To the right, you can see it above the other drawer, and you can easily see the contrast between the color and the grain, with, as you’d expect, the underlying Birch being much finer in grain than the Mahogany.
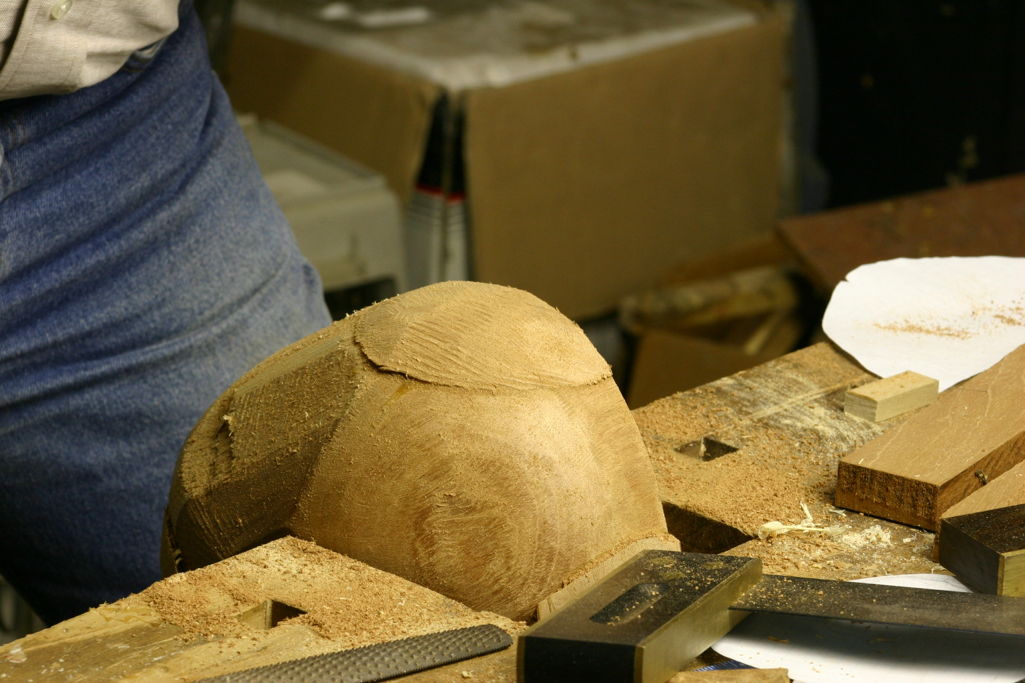
On 23 August, I wrote that the second veneer went on with rather better results than the first, and it was now time to move on to the next piece of unfinished business. In the previous week, I’d glued the final two pieces of mahogany to the main dome, and this day, I finished the roughing out with rasps. Next job would be to fit the dome onto the base, with its drawers.

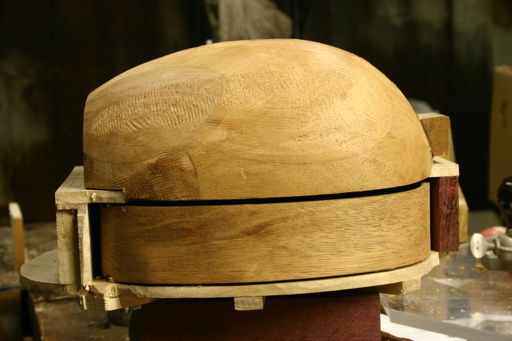
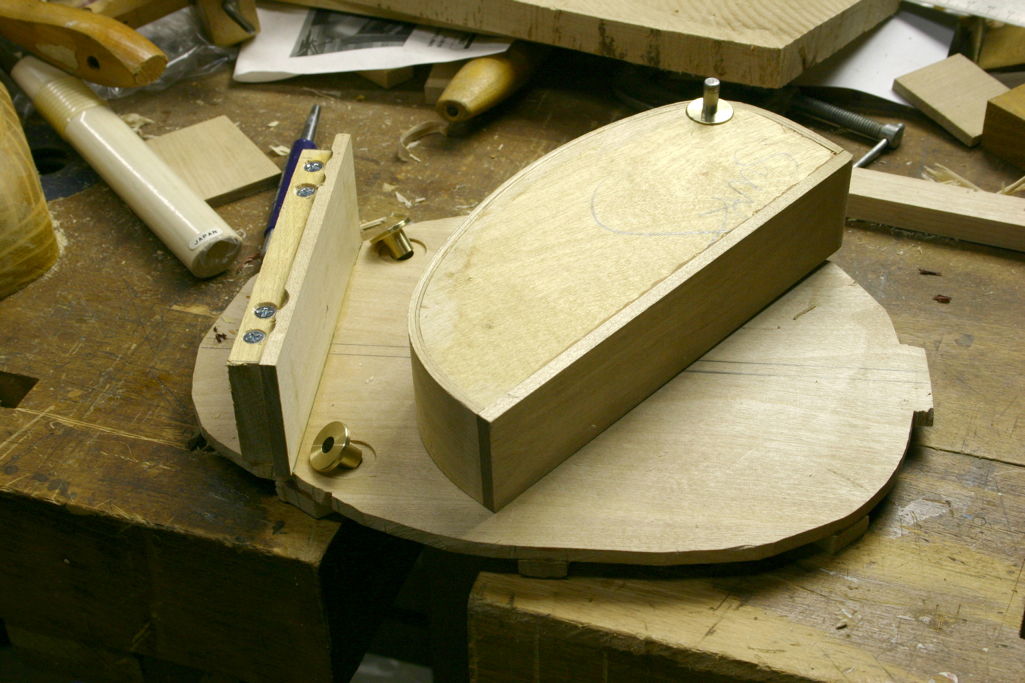
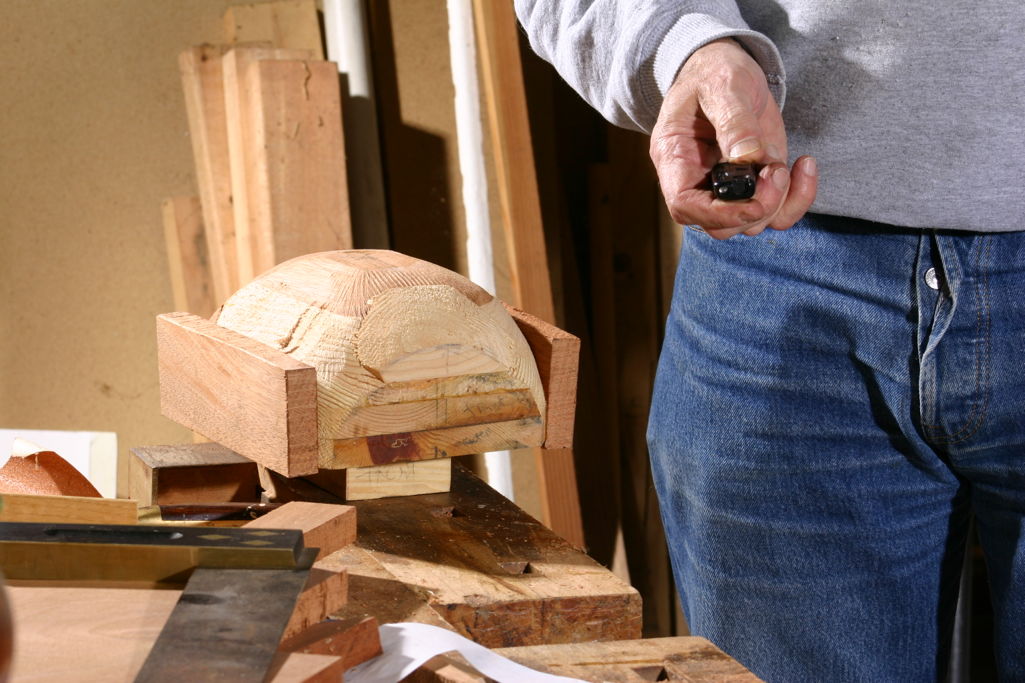
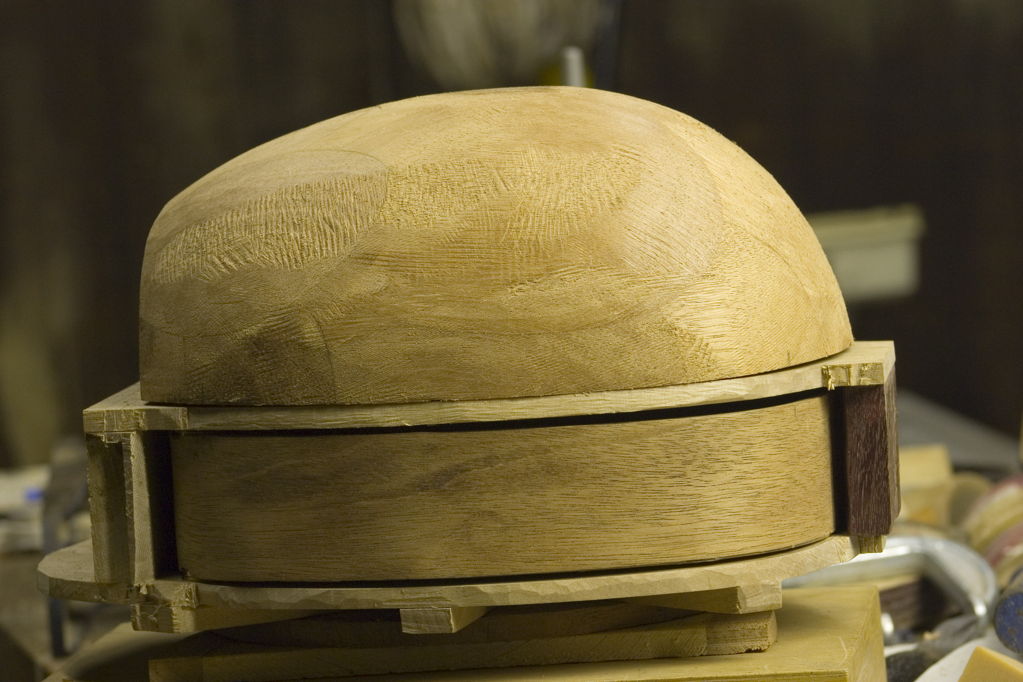
I realized that the dome as constructed was rather too high, so I cut it down by removing 1 cm from the bottom. Next, I would have to cut away the layer it was sitting on and would recess the bottom of the dome in a matching way so that the dome dropped down to meet the drawers below. It’d be rather tricky, but the idea was for there to be only a slight gap between drawers and dome, except at front and rear. At the left, you see the dome sitting on the roof of the drawer-chamber before I started doing any of the intended cutting-away.
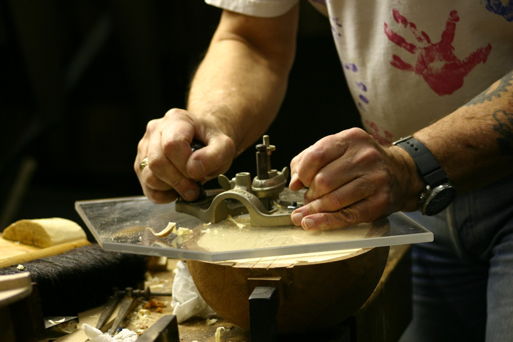
In the next two pictures, to the right, the job is to recess the dome enough for it to drop down to hide the roof of the drawer-chamber. On the first, I’m using a specialty tool called a router plane, which I made suitable for the job by mounting it on a thick sheet of transparent plastic, probably Plexiglas®. I had owned the tool for probably 25 years before finding a use for it, and it turned out to be essential to the project. On the second, I’d be working for a while to get the proper depth, since this was still too shallow. (6 Oct, ’06)
Recessing the dome was slow work indeed. But here, I tried seeing how the dome was beginning to look when sitting above the drawers. It would still have to be cut back some, since it overhung in places, but I reckoned that within a few weeks after we got back from our trip to southern Spain, I should be able to go on to the next steps. (9 Oct, ’06)

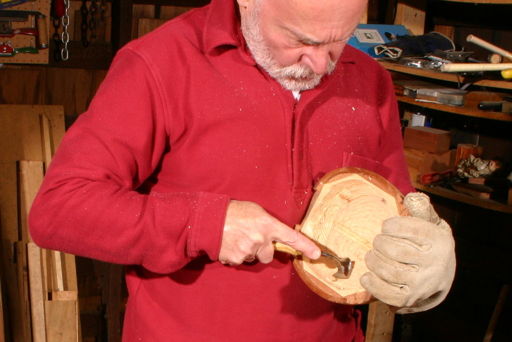
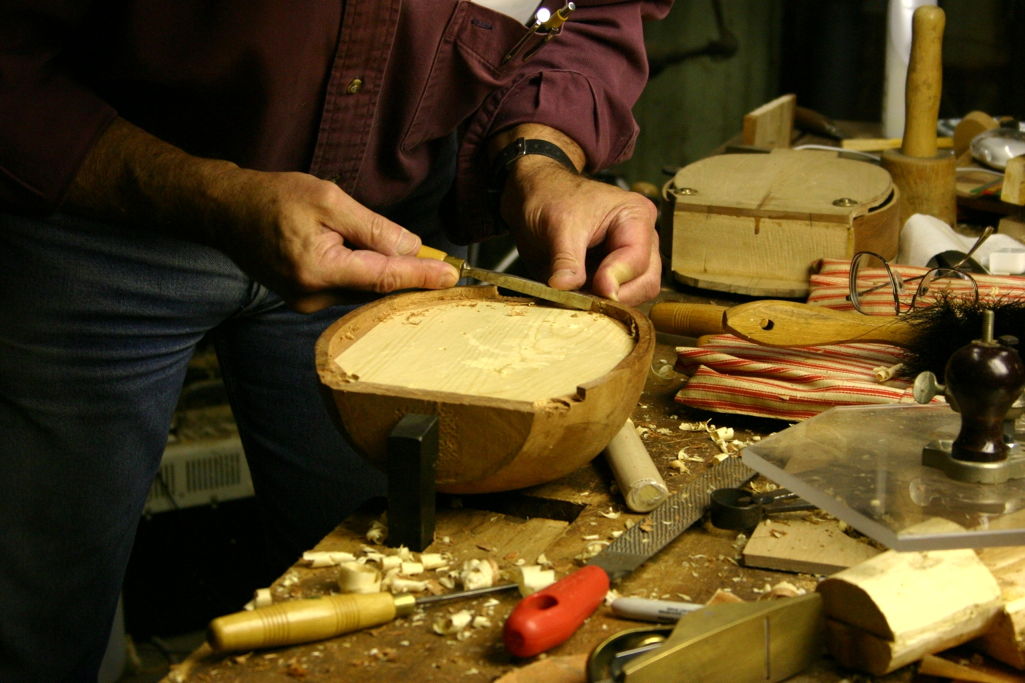
Home from Spain, I resumed work. Not too much recessing remained to be done: just a couple of millimeters at most. Here, to the left, I was cleaning up the inside surface of the lip with a gouge. (18 Nov, ’06)
After more planing away, it was looking like the dome was a pretty good fit. A few more adjustments and I could start worrying about attaching the dome to the base with hinges, and trimming everything so there would be no overhangs. (30 Nov, ’06)
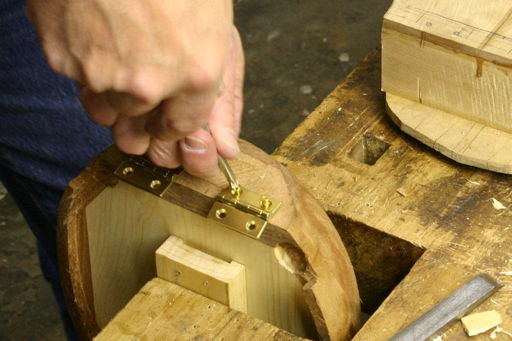
There seemed no reason to mortise the hinges into the dome and the base; this made installing them considerably easier, too. To the left, I’m attaching the hinges onto the dome with temporary wood screws. Later, when the dome was hollowed out, the hinges would be attached with machine screws that were held in place by nuts inside the dome. (12 Dec, ’06)
Mostly, I hollowed the dome out in the drill press, using a 1″ Forstner bit, which cuts fast and stays cool. To the right, I’m smoothing out the inside, which still has a good half inch thickness of pine, using a scorp that I had just recently ordered from Woodcraft. (19 Dec, ’06)
(Now in 2020, I’m hoping to find a picture of the interior of the dome when all the pine was cut away. No luck as of 1 Sept.)
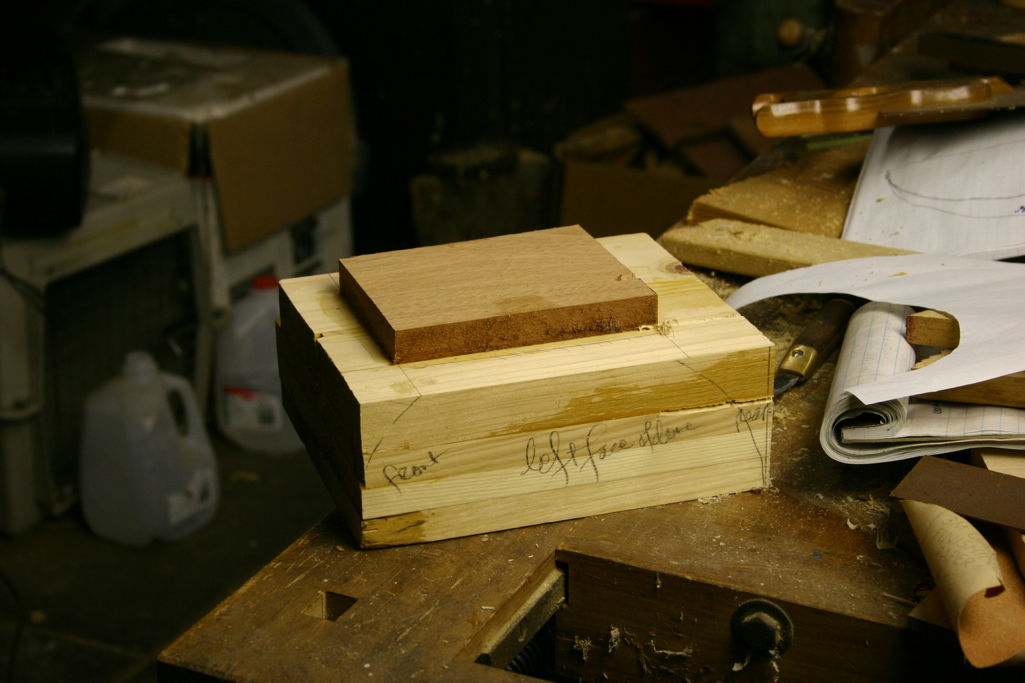
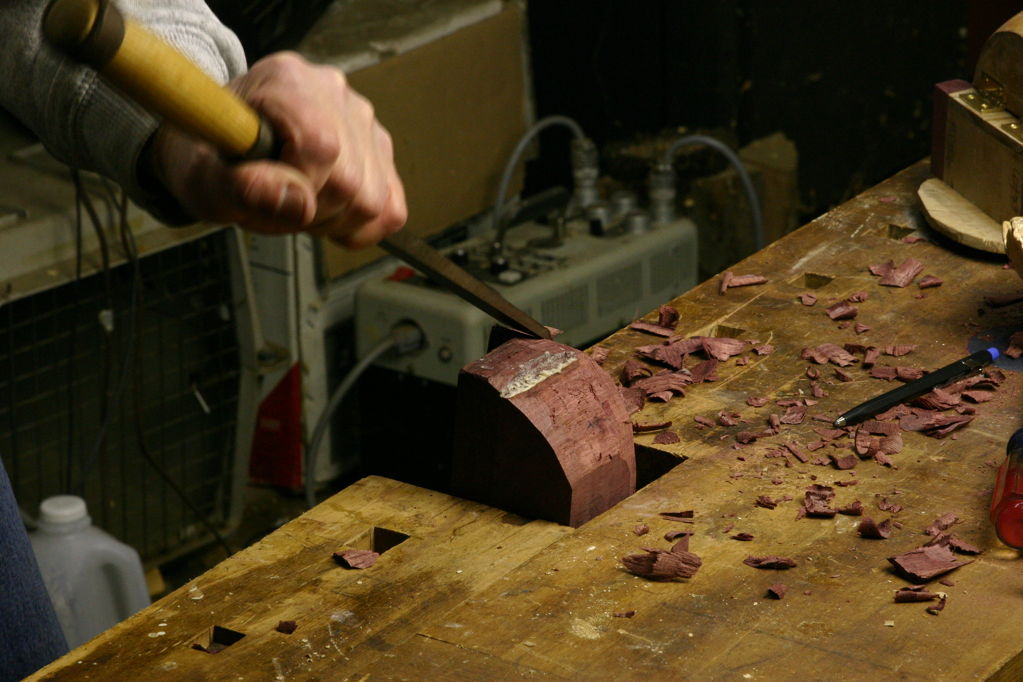
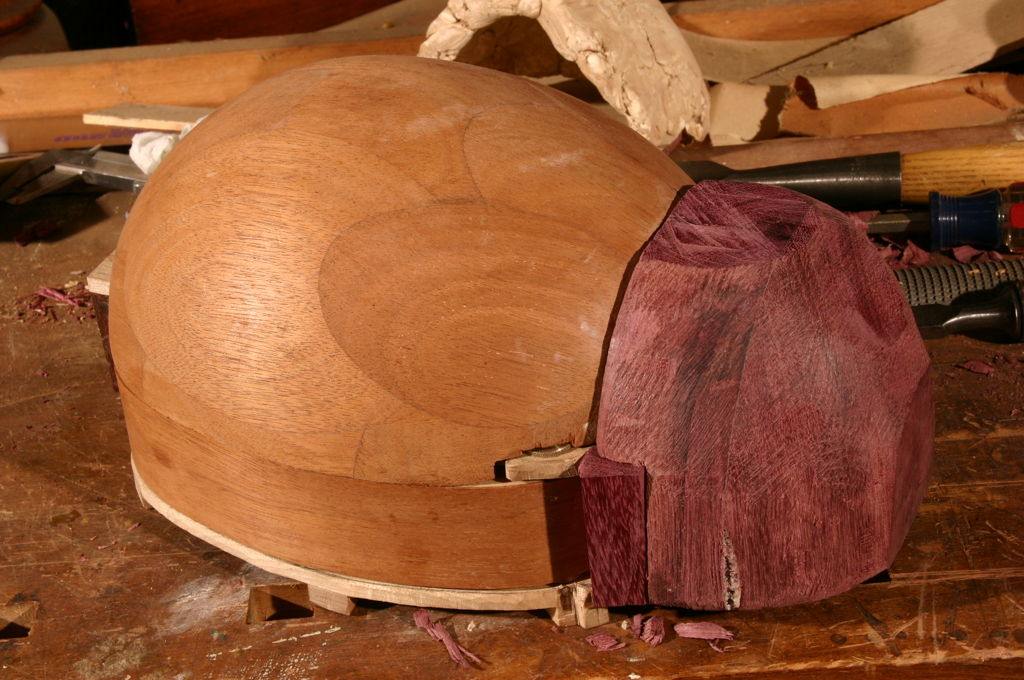
And now for the last or almost-last part of the construction, the fore-piece of the Ladybeetle, the part that the entomologists call the pronotum. Now that the dome was pretty well fitted to match the drawers below, this became the big challenge. I had always known that I’d use Purpleheart, the same wood used for the pulls and the feet of the miniature chest. The only other choices for a naturally dark wood would have been Ebony and Rosewood, both of which are far too hard, too difficult to work, and too costly. Not that Purpleheart is as cheap as Pine or even Mahogany! And it’s not soft, easy to work, nor of low density, either. I had already bought a couple of blocks of it, which I glued together, and I made a rectangular cut into it so that it’d sit right on the ledge that was in front of the dome.

Purpleheart! Generally you use it for accents only, but it was going to make up the whole front end of the box. Here, at the left, you see the cutout that permitted the block to sit on the ledge in front of the dome, and what I was doing was chopping out spaces for the hinges, to permit the block to sit flush. (26 Dec, ’06)
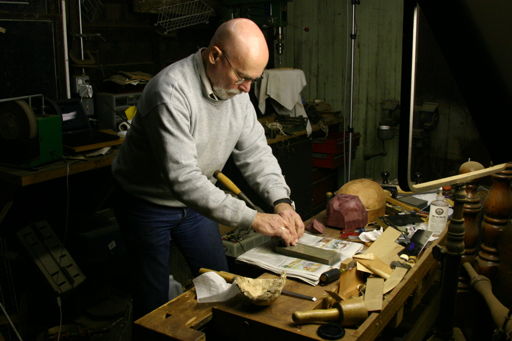
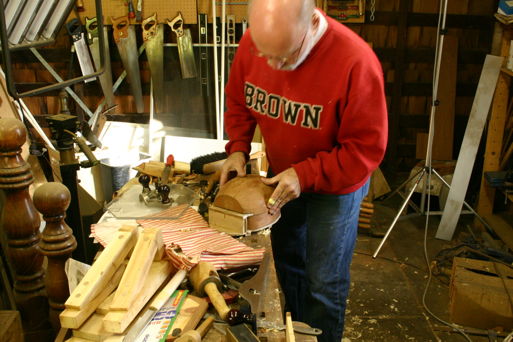
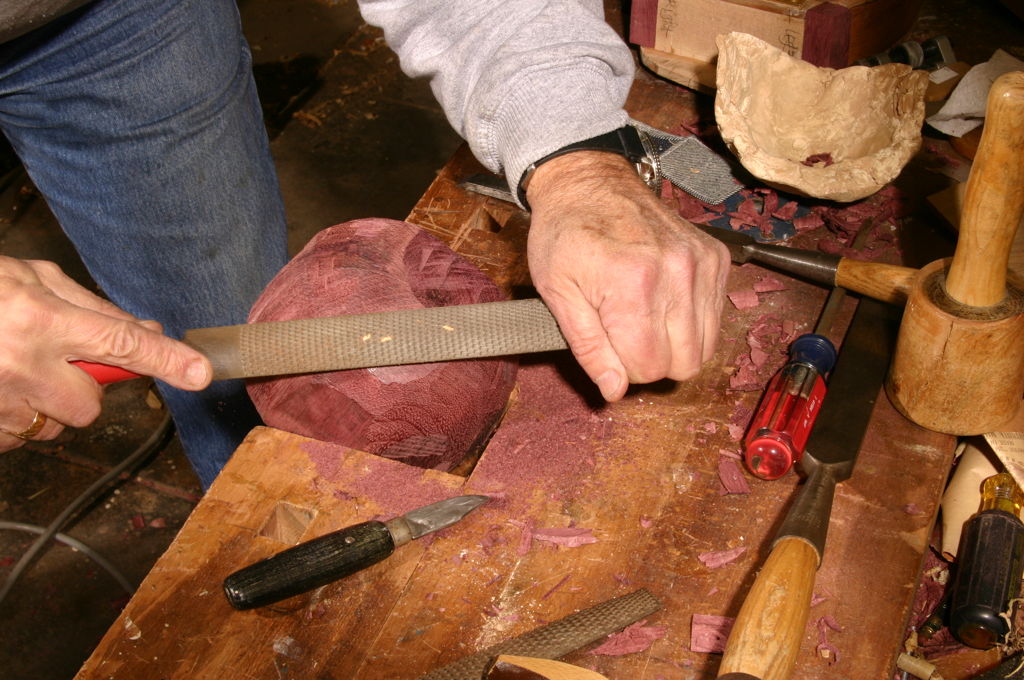
None of the previous pictures have shown the activity to the left, which takes up a fairly large amount of my time. Especially with a hard wood, you have to resharpen tools frequently. Planing Purpleheart, for instance, means resharpening the iron perhaps as often as every fifteen minutes. Here I’m preparing a chisel for the heavy duty to come. (4 Jan, ’07)


Later that same day, it seemed that the project was starting to look the way it was meant to. In the background of the image to the left, you see the clay mockup I made to get an idea of the shape that I wanted for the pronotum (big image, small).
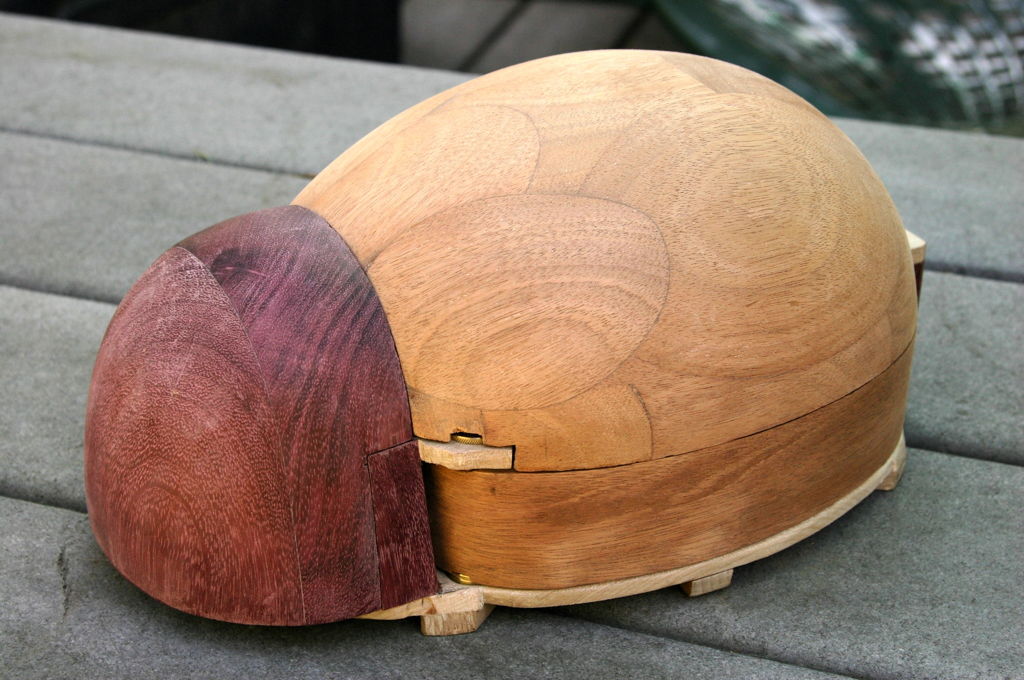
To the right, in outdoor lighting on 19 Jan, ’07, the dome and pronotum were pretty much finished (pronotum still needed some cutting back on the other side), and they were nicely sanded. Next to make some spots—Purpleheart on the dome, “Vegetable Ivory” on the pronotum (big image, small).
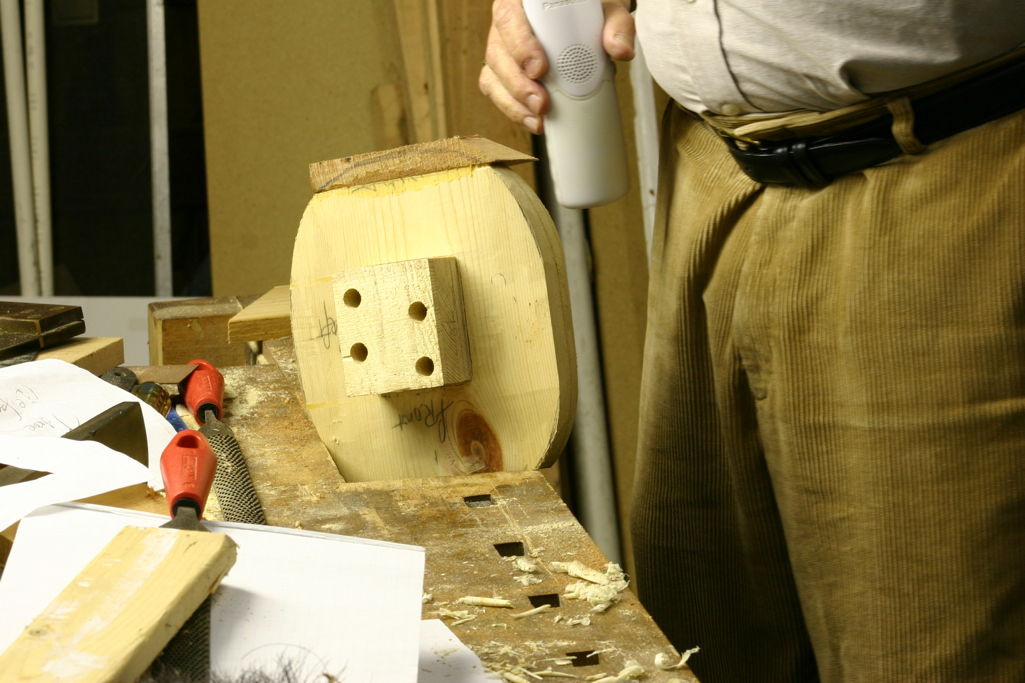
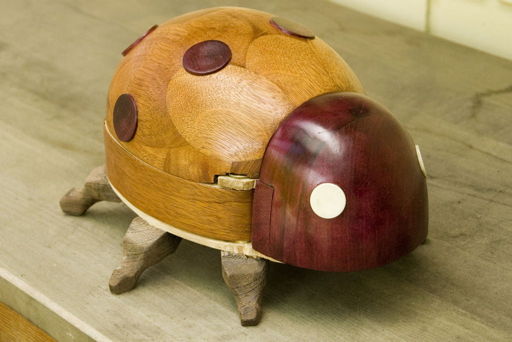
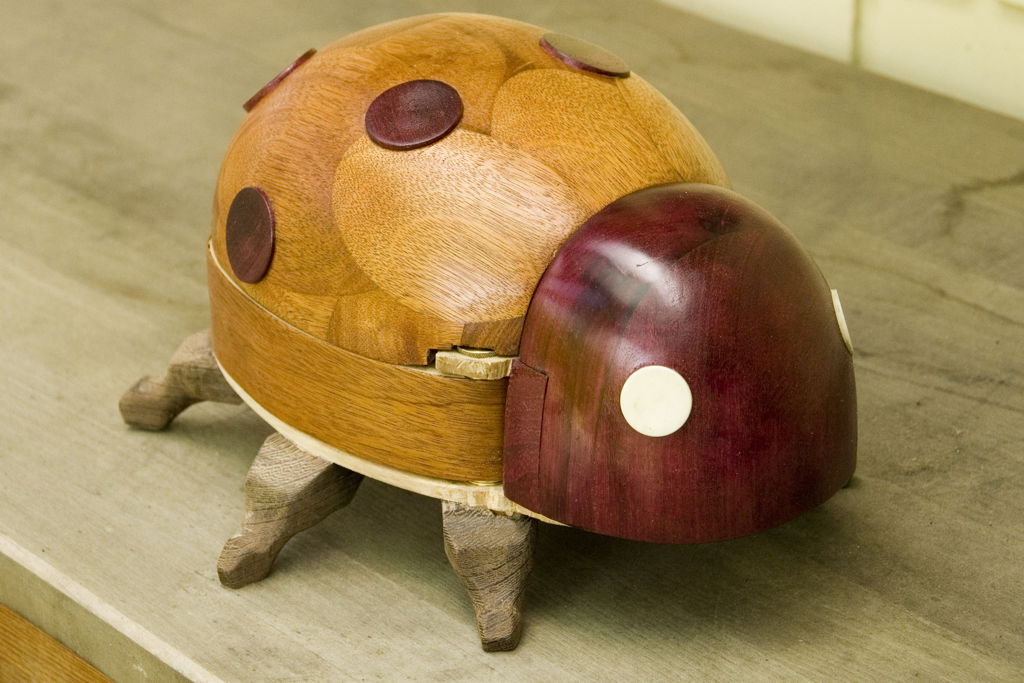
It was getting towards the end of January, and things were finally falling into place. In the upper picture at the right, you see that I’ve installed little buttons as handles for opening the drawers. One of the drawers has even received its first coat of tung oil, and you can see what a difference it makes in the color. The dome will be approximately that color, too. Among other things I had gotten out of the way by this time were: placing six spots on the dome and two on the pronotum; drilling four 7/8″ holes into the pronotum, partially to lighten it (it’s really heavy!) and partially to furnish additional storage space in the piece. These holes will be threaded, and will have threaded plugs to keep the treasures from falling out. Also, I was most of the way to making the legs for the piece. You see four of them to the right of the drawers. I know, they look more mammalian than insectile, but they do need to be pretty sturdy. And of course since she’s an insect, she needs six of them. I expected to get the remaining two roughed out a few days after this picture was taken.
Here, on 2 Feb, ’07, oiling begun, probably complete on the drawers, but the end-grain on the dome was very thirsty, and I thought I’d probably be giving two coats of tung oil per day for a week more. The feet were done and glued in, but were not oiled at all yet. Remaining: stain all exposed birch, finish the oiling, strengthen the feet by screwing them in place (big image, small).
And so the project was done. You can see the final result in the movie up top.